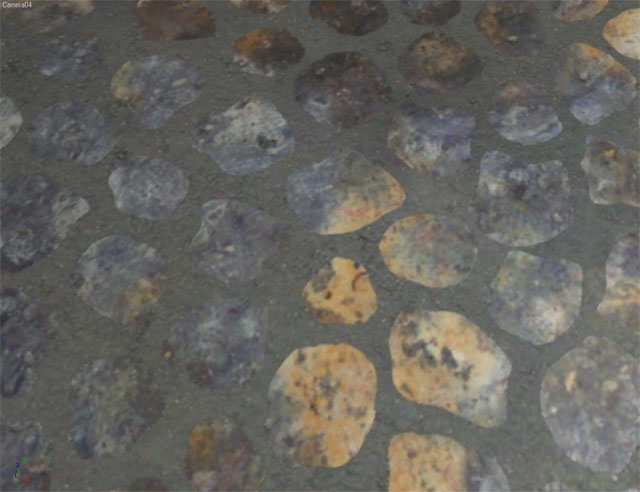
Diffuse Map
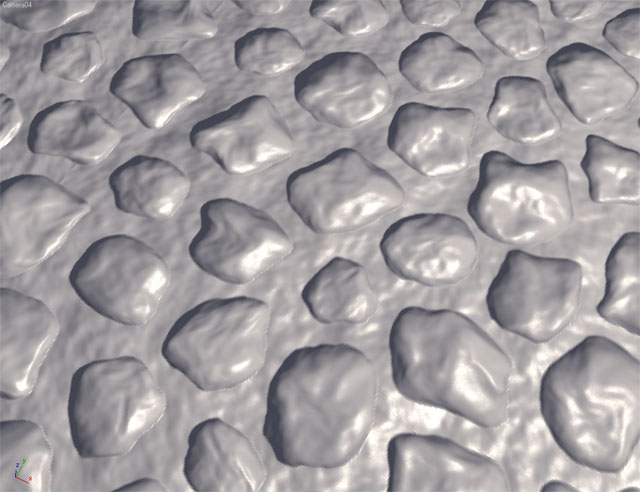
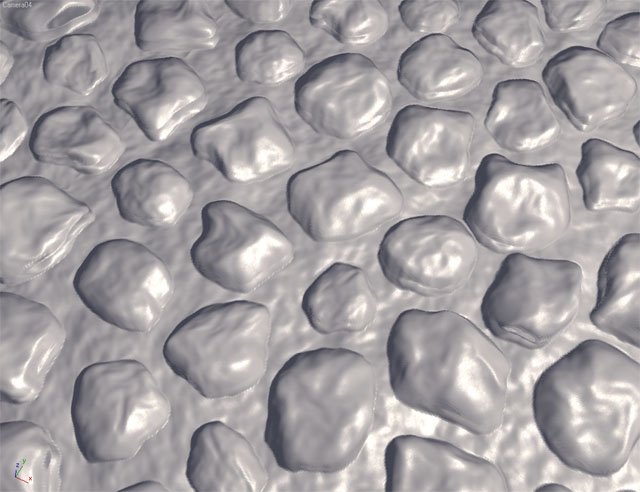
Normal Map
Specular Reflection
Diffuse & Specular
Height Map
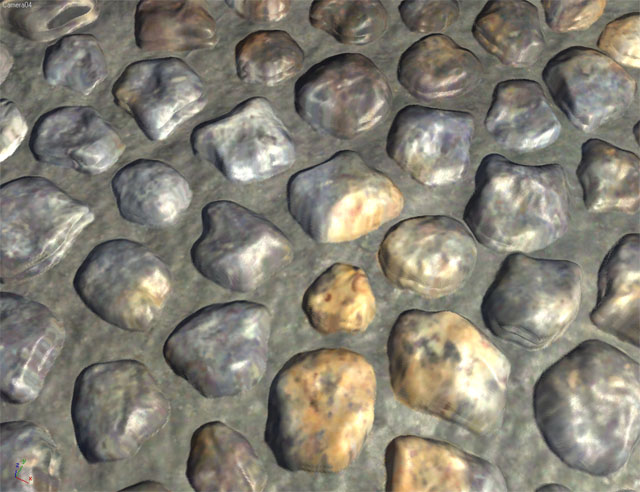
Tex Coords Offset
Complete Shader
|
|
OFFSET MAPPING SHADER
SPECS:
HARDWARE:
|
DirectX 9 or higher
|
TEXTURES:
|
- Diffuse Texture
- Normal Map Texture
- Specular Mask (diffuse alpha channel)
- Height Map (normal map alpha channel)
|
INPUTS:
|
- Ambient Color
- Diffuse Color
- Specular Power (shininess)
- Light Color
- Light Position
- Offset Amount
|
PASSES:
|
One
|
DOWNLOAD: (right click and choose "save target as...")
 Offset Mapping Shader Offset Mapping Shader
COMMENTS:
This shader has all of the features of the Normal Map Specular shader plus one additional feature that makes the normal mapping look much more convincing. It's called Offset Normal Mapping, Parallax Mapping, or Simulated Displacement Mapping. It's one of the features that is exhibited prominently in the Unreal Engine 3 Tech Demo.
The idea behind this added realism is to "punch out" the surface of the model based on a height map that goes along with the normal map so you get parallax movement on the surface when your viewpoint changes. It's hard to explain it, but when you see it, it surprising how much more real the bumps look.
The effect is achieved by multiplying the UV coordinates used for the normal map and the diffuse map by a height map value (stored in the alpha channel of the normal map) and by the view vector in the pixel shader. We then use the resulting coordinates to look up our normal map and diffuse map - instead of the original texture coordinates.
If you compare the "Diffuse & Specular" image with the "Tex Coords Offset" image at the left you can see that the cobblestones in the second image look much more believable. This is a result of the new texture coordinates that we calculated in the pixel shader.
You can control the height of the bumps with the "Offset" value in the shader. You also need to include a height map in the alpha channel of your normal map. If you created the normal map with high res geometry, you can get a height map by rendering a Z depth image of the geometry. If you created your normal map by converting a bump map, you can just use the original bump map in the alpha channel. If you just have a normal map and need to generate a height map from it, you can find a great tool to do that right here.
Normal Map compression is an option that you can use with this shader. Copy the red channel of your normal map to the alpha channel and then put the height map into the red channel instead. Then delete the blue channels and save your normal map in DXT5 DDS format. Put your compressed normal map in the DXT5 Normal Map slot for the shader. Then choose "Compressed" as the technique instead of "complete."
INSTRUCTIONS:
For instruction on how to apply this shader to your model in 3DS Max, read my tutorial - HLSL Shaders in 3DS Max.
For instruction on how to create normal maps for this shader, read my tutorial - Creating and Using Normal Maps.
If you'd like to use some of my textures with this shader instead of making your own, you can find them here.
ADDITIONAL:
If you have trouble getting this shader to work correctly in 3DS Max, send me an email. I'll see If I can help. Also, I'm an artist - not a programmer. If you are a programmer or know more about shaders than I do and you find something in this shader that is poorly written, broken, etc, I'd love to hear from you. I've mostly taught myself how these things work so if you have some pointers for me that would be great!!
Return to the list of Shaders
|