Creating Normal Maps from Bump Maps
The easiest method of making your real-time models look more detailed is to used a normal map created from a bump map. In this method, the normal map provides, in real-time, the exact same funtionality that a bump map adds to a software rendered model. The basic principle works like this:
- Create a real-time model.
- Paint a bump map for your model in Photoshop or another paint program.
- Convert the bump map to a normal map with Nvidia's Photoshop plug-in. Other simple programs can also do this. See the last page of the tutorial for more info.
- Apply the normal map to the model and render it will a per-pixel lighting shader.
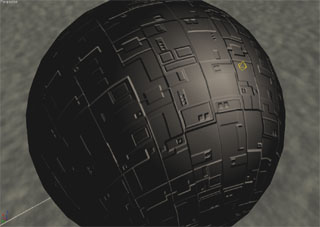
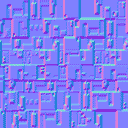
You end up with a model that looks like it has a lot of extra surface detail. This process is probably pretty simple to understand so in this tutorial I'll just cover the step that might be new to you: Converting the bump map to a normal map.
The conversion is done using a Photoshop plug-in from Nvidia. You can follow the link on page 3 of the tutorial to download this plug-in. Once you've downloaded it just run the executable to install it. Next, follow the steps below to create a normal map.
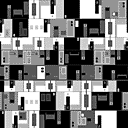
- Open your bump map in Photoshop. Be sure that it is a "power of two" image (64x64 or 128x128 or 256x256, etc) and that the light colored pixels represent raised surface details and the dark pixels represent lowered surface datails.
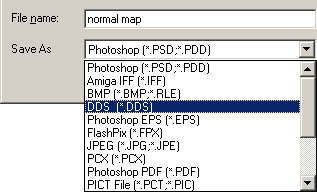
- Choose "Save As" from the File menu. Give your texture a name and choose DDS format. DDS stands for Direct Draw Surface. It's an image file format that is used natively by DirectX. Don't worry if DDS isn't the final file format that you want. You can always open the image again and save it as another format once it's converted.
- When you click the Save button, this options dialog will appear that allows you to specify all of the parameters for saving your image.
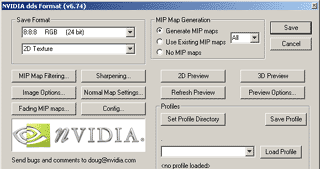
I was really impressed with how much control all of these options gave me over exactly what I wanted to do with my image. You can do a lot more with DDS format than we're going to cover in this tutorial.
- Click on the "Normal Map Settings ..." button to access the normal map conversion options. The following window will open:
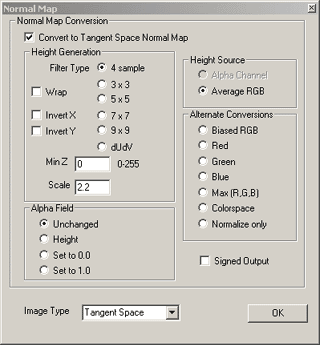
- Click the "Convert to Tangent Space Normal Map" box. Set Filter Type to "4 sample" and Scale to "4." Set Height Source to "Average RGB." (Once you've converted your bump map to a normal map, you're welcome to come back to this dialog and play around with these settings to achieve different results. For example, the scale value will make your bumps appear higher of lower off of the surface.) When you're done, click the OK button.
- Back at the DDS format options window, click the Save button. This will convert your image to a normal map and save it in DDS format. When the dialog goes away, you're image will look just the same as it did before you started. Close the image and re-open it to see the normal map that you have created.
Pretty easy, isn't it? Now the cool part comes when you apply the normal map to your model using per-pixel lighting. You can jump ahead and do that now if you want. Just go to page 6 of the tutorial and follow the instructions there. Or you can go to the next page of the tutorial and learn how to use a normal map to make your low poly model look like a high poly model.
Back Next
Page 1: Introduction
Page 2: Enter the Normal Map
Page 3: What You'll Need
Page 4: Using Normal Maps for Bump Maps
Page 5: Normal Maps for High Poly Detail
Page 6: Applying Normal Maps to Your Model
Page 7: Additional Tips and Tricks
Page 8: Links to Additional Information